Install LAMP server in CentOS 6.4
LAMP is a acronym for Linux, Apache, MySQL and PHP. In this very first tutorial on my blog, I will walk through the steps on how to install LAMP server in CentOS 6.4.
For the sake of installation information, and to rule out any configuration/hardware mix-up's, here is the quick high level details of my test machine. Keep in mind, this is specific to my installation, and you may need to make some adjustments depending on how you are setting up your test environment. With that in mind, consider yourselves informed!
 At this point you might want to add a few other modules that will be helpful for your coding. And don't hurt to have installed.
 Which leads too..
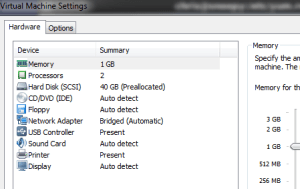
- My test machine is a Virtual Machine, running on VMware Workstation v9.0.0
- I have installed the VM with the following settings:
-  My testbox hostname is: snoopy.localdomain.vm
Install Apache
yum install httpdStart apache and set it to start automatically on every reboot.
service httpd start
chkconfig httpd on
Test Apache
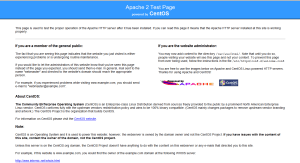
Open your Browser and Enter the IP address for your machine âhttp://xxx.xxx.xxx.xxxâ³. You will see the Apache splash page.
Install MySQL
yum install mysql mysql-serverStart MySQL and set it to start automatically on every reboot.
service mysqld start
chkconfig mysqld onOnce it is done installing, you can set a root MySQL password:
/usr/bin/mysql_secure_installationThe prompt will ask you for your current root password. Since you just installed MySQL, you wonât have one, so leave it blank by pressing enter.
Enter current password for root (enter for none):
OK, successfully used password, moving on...
Then the prompt will ask you if you want to set a root password. Go ahead and choose Y and follow the instructions. CentOS automates the process of setting up MySQL, asking you a series of yes or no questions. Itâs easiest just to say Yes to all the options. At the end, MySQL will reload and implement the new changes.
By default, a MySQL installation has an anonymous user, allowing anyone
to log into MySQL without having to have a user account created for
them.  This is intended only for testing, and to make the installation
go a bit smoother.  You should remove them before moving into a
production environment.

Remove anonymous users? [Y/n] y
 ... Success!

Normally, root should only be allowed to connect from 'localhost'.  This
ensures that someone cannot guess at the root password from the network.

Disallow root login remotely? [Y/n] y
... Success!

By default, MySQL comes with a database named 'test' that anyone can
access.  This is also intended only for testing, and should be removed
before moving into a production environment.

Remove test database and access to it? [Y/n] y
 - Dropping test database...
 ... Success!
 - Removing privileges on test database...
 ... Success!

Reloading the privilege tables will ensure that all changes made so far
will take effect immediately.

Reload privilege tables now? [Y/n] y
 ... Success!

Cleaning up...

All done!  If you've completed all of the above steps, your MySQL
installation should now be secure.

Thanks for using MySQL!
Install PHP
yum install php php-mysql
Restart Apache server
service httpd restart
Test PHP
Create a test php page, and save it to the /var/www/html directorynano /var/www/html/testphp.php
< ?php phpinfo(); ? > <-- (Make sure you fix the tags)
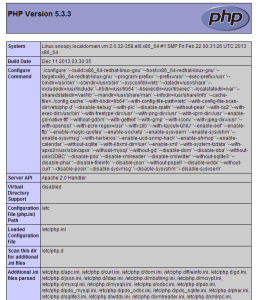
Now open the testphp.php file in browser using http://xxx.xxx.xxx.xxx/testphp.php. If everything is done correctly, it will display the details about your php configuration. If not, go back and check your steps, and insure you didn't miss any steps.
At this point you might want to add a few other modules that will be helpful for your coding. And don't hurt to have installed.
yum install php-gd php-imap php-ldap php-mbstring php-odbc php-pear php-xml php-xmlrpcYou might want add APC too - APC is a free and open PHP opcode cacher for caching and optimizing PHP intermediate code. It's similar to other PHP opcode cachers, such as eAccelerator and Xcache. It is strongly recommended to have one of these installed to speed up your PHP page.
yum install php-pecl-apcAnd restart Apache..
service httpd restartNOTE - Additional php modules can be located by performing a search.
yum search php
Install phpMyAdmin
phpMyAdmin is a free open source web tool, used to manage your MySQL databases. By default phpMyAdmin is not found in CentOS official repositories; however it is available in the EPEL repository. EPEL stands for Extra Packages for Enterprise Linux. At the time I wrote this, 6-8 was the latest version.wget http://dl.fedoraproject.org/pub/epel/6/x86_64/epel-release-6-8.noarch.rpm
rpm -ivh epel-release-6-8.noarch.rpmNow you can install phpMyAdmin
yum install phpmyadmin
Configure phpMyAdmin
Open the phpmyadmin.conf file and make the following changes.nano /etc/httpd/conf.d/phpMyAdmin.confIf you want to access phpMyAdmin from anywhere other then the localhost, then comment the following lines, just below the beginning of the file.
Alias /phpMyAdmin /usr/share/phpMyAdmin
Alias /phpmyadmin /usr/share/phpMyAdmin

#
#
#     # Apache 2.4
#
#       Require ip 127.0.0.1
#       Require ip ::1
#
#
#
#
# Apache 2.2
#     Order Deny,Allow
#     Deny from All
#     Allow from 127.0.0.1
#     Allow from ::1
#
#
Copy the config sample file and change the authentication method from "cookie" to "http".
cp /usr/share/phpMyAdmin/config.sample.inc.php /usr/share/phpMyAdmin/config.inc.php
nano /usr/share/phpMyAdmin/config.inc.php
/* Authentication type */
$cfg['Servers'][$i]['auth_type'] = 'http';
Restart the Apache service
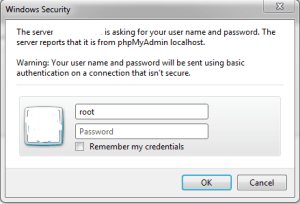
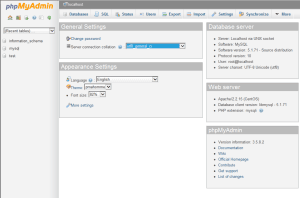
[root@localhost /]# service httpd restartNow you should be able to access the phpmyadmin console using http://ipaddress or http://domainname/phpmyadmin/. Enter your MySQL username and password which you have given in previous steps. In my case its ârootâ and âpasswordâ. Shh, don't tell anyone.. ;)
Which leads too..
Tags:
0 Comments
Leave a Comment